
I find this one of the simplest and most effective ways of converting a colour image to black and white.
First, open your photo and then add a Channel Mixer adjustment layer by clicking on the icon at the bottom of the layers palette.
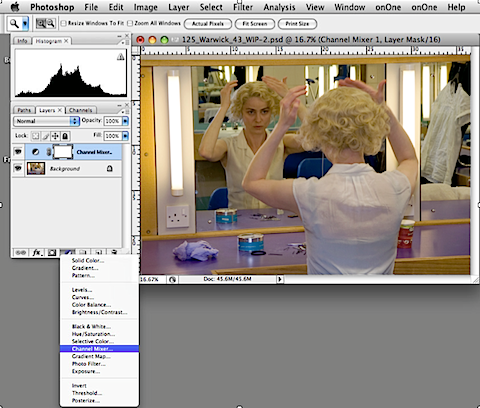
Select Monochrome and adjust the percentages for RGB.
There is a common misconception with this technique – the RGB percentages must equal 100%. The truth is they do not need to equal 100%, they can actually equal whatever you want them to be, since the main goal is to make sure the photo looks the way you want it to look.
When I have used this method before, I usually start with the following settings:
R: 70% G: 30% B: 5%
From there I adjust the settings until the photo looks the way I want it to.
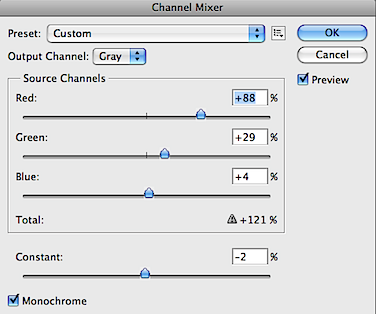
In this case, I used R: +88% G: +29% B +4%
Adjust the percentages until the photo looks good, don’t worry about great, we’ll get to that in a moment. You can also adjust the constant percentage to lighten or darken the photo. In this case I darkened the photo by setting the constant to -2%.
Now you’ve got it looking as good as you can, use a Levels adjustment layer to check where your lightest and darkest tones are in the image. If it’s looking rather flat, tweaking the levels can give the image more punch by increasing the contrast.
Create the layer by choosing from the same drop-down list as before, shown in the first diagram above.
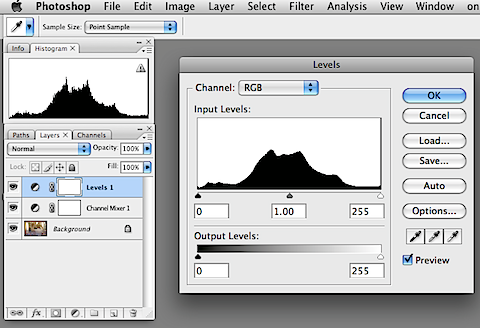
The Levels diagram above shows the tonal range of an image with 255 different tones between 0 – pure black and 255 – pure white.
The tones in my image were well distributed so I didn’t make any changes at this point but I did some fine tuning using a Curves adjustment layer to increase the contrast.
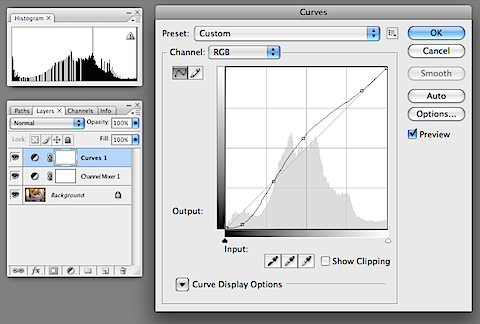
I pulled upwards in the centre of the line to brighten the mid-tones, downwards at the bottom to further increase the darkness of the darker tones but I pulled the top of the line back a little to avoid blowing out the highlights which are bright enough.
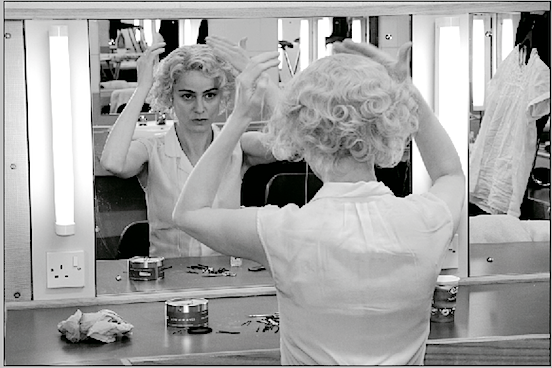
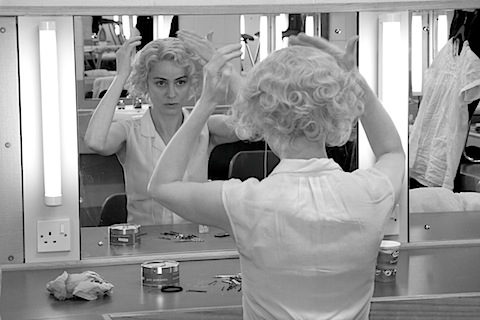
The final image
LEVELS
Read more: http://www.digital-photography-school.com/digital-black-and-white#ixzz1Ob07PnYz